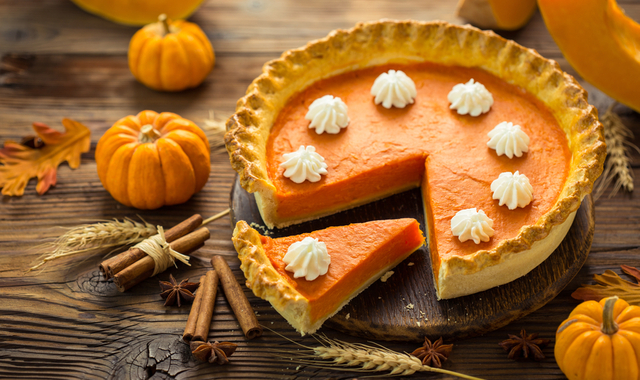
If you thought a delectable pumpkin pie couldn't be healthy, think again! Our homemade Crustless Pumpkin Pie is not only a culinary masterpiece but also a guilt-free delight. Prepare to be amazed by the unbeatable combination of flavor and nutrition!
Prepare yourself for the impossible – a pumpkin pie that's both unbelievably delicious and waistline-friendly. In fact, you could devour all eight servings of this pie and still consume fewer calories and less fat than a mere slice of traditional pies.
Now, we're not suggesting you down the entire pie in one go (though the thought might cross your mind). But we promise, with each bite, the rich and decadent taste, coupled with the creamy pumpkin custard texture, will leave you craving for more.
It's time to experience a pumpkin pie that's truly out of this world!
A Pumpkin Pie Phenomenon
This pumpkin pie recipe has fostered a devoted following over the years, earning its place in the hearts of many. Fans don't limit themselves to Thanksgiving; they indulge in its goodness year-round. Some even kickstart their day with it – and why not?
This pie is a nutritional powerhouse, boasting low calories, high fiber, and a wealth of vitamin A. It's a perfect fit for those on a Weight Watchers diet, as it's incredibly point-friendly. And for those who prefer sugar-free options, you can effortlessly swap in your favorite sugar substitute.
But what truly sets this pie apart is its unique twist – it's devoid of evaporated or sweetened condensed milk, making it a healthier choice.
What You Need to Make This Recipe
To begin your masterpiece, gather these essential ingredients:
- Pumpkin Puree: The heart of your pie.
- Cinnamon and Pumpkin Pie Spice: For that warm, aromatic embrace.
- Milk of Your Choice: Customize your pie with your favorite milk.
- Sweetener: A touch of sweetness to delight your taste buds.
- Flour or Almond Meal: Your choice, your texture.
- Baking Powder: To lift your creation.
- Salt: To balance the flavors.
- Pure Vanilla Extract: For a hint of sophistication.
Customization Magic
Tailor your pie to perfection with these magical options:
For Thickness: Achieve sliceable perfection by adding a tablespoon of ground flax, one egg (please note, not suitable for vegans), or two teaspoons of cornstarch.
Low-Carb and Keto Wonders: Dive into the world of low-carb and keto by using xylitol or erythritol for a sugar-free delight. You can also swap in almond flour or almond meal for an equal amount of flour.
Coconut Flour Alchemy: If you prefer the exotic touch of coconut flour, remember that it requires less liquid to achieve the desired pumpkin pie-filling texture. It's like a sponge, absorbing moisture gracefully.
Vegan Enchantment: Embrace compassionate cooking with a vegan twist. Select your preferred plant-based and dairy-free milk, such as almond milk or coconut milk, to create a vegan pumpkin pie that's free from eggs, dairy, and heavy cream.
Allergen-Free Sorcery: Our crustless pumpkin pie is designed to accommodate various dietary needs. It can be:
Soy-free
Nut-free
Gluten-free
Oil-free
Elevate your pumpkin pie game with these ingredients and customization options. Craft a masterpiece that suits your taste and dietary preferences, and let your taste buds dance with delight.
Fresh or Canned Pumpkin Puree
When it comes to crafting the perfect pumpkin pie, the choice between fresh or canned pumpkin puree can make all the difference. Here's what you need to know:
Canned Pumpkin Convenience: Our recipe recommends using canned pumpkin for ease and consistency. However, around Thanksgiving, these cans tend to vanish from grocery store shelves, especially the beloved Libby's brand.
Organic Aisle Treasure Hunt: If you find yourself in this predicament, head to the organic section of the store. If canned pumpkin is still elusive, consider an adventure in DIY pumpkin puree.
Purchase a fresh pumpkin, roast it, and then transform the flesh into your very own homemade pumpkin puree.
Sweet Potato Substitution: In a pinch, roasted sweet potato can be a delightful substitute for pumpkin. Check out our guide on how to perfectly cook sweet potatoes. You can also opt for roasted or canned butternut squash puree as an alternative.
Pumpkin Puree vs. Pumpkin Pie Filling: A crucial note of distinction – always opt for pumpkin puree, not pumpkin pie filling. Canned pumpkin pie filling comes with additional sugars and spices already mixed in. In contrast, pumpkin puree contains only the essence of cooked, pureed pumpkin.
Embrace the pumpkin puree that suits your preference, and embark on a culinary journey that will result in the perfect slice of pumpkin pie!
How to make the pumpkin dessert
Are you ready to embark on the journey of creating a mouthwatering pumpkin dessert that will leave everyone craving for more? Follow these simple steps to culinary perfection:
Step 1: Preheat and Prepare
Preheat your oven to a toasty 400 degrees Fahrenheit.
Grease a nine or ten-inch pan to ensure your dessert slides out with ease.
Step 2: Mix the Pumpkin Base
In a spacious mixing bowl, whisk together the can of pumpkin, your choice of milk, flaxmeal or egg, pure vanilla extract, and, if desired, a touch of oil. No need for a blender here; just a good old-fashioned whisking.
Step 3: Spice It Up
Combine ground cinnamon, pumpkin pie spice, salt, baking powder, flour, and your choice of sugar or sugar-free sweetener. If you've opted for cornstarch, this is the place to add it. For those aiming for a one-bowl wonder, toss these dry ingredients into the same bowl as the liquid ones.
Step 4: Create the Batter
Stir the mixture to form a delightful batter, laden with the essence of pumpkin and fragrant spices.
Step 5: Fill and Bake
Gently transfer the pumpkin pie filling into your prepared pan, spreading it evenly.
Place your creation on the center rack of the oven and bake for 35 minutes. Don't fret if it still appears gooey after baking; the magic is yet to come!
Step 6: Let It Set
Allow your freshly baked pie to cool fully, uncovered. Patience is key, as it needs at least six hours to firm up to perfection.
Step 7: Slice and Savor
Once the waiting game is over, slice your masterpiece and savor every bite of creamy, flavorful pumpkin goodness.
Step 8: Storage Wisdom
To keep the pumpkin party going, store any leftover pie in the refrigerator. Simply cover it with saran wrap or aluminum foil to maintain its freshness. Alternatively, individual slices can be preserved in an airtight container in the fridge or freezer for future indulgence.
Mini Pumpkin Pie Experiment
For those who love to experiment, some wonder if this recipe can be transformed into crustless mini pumpkin pies by baking the filling in muffin liners instead of a traditional pan. While we haven't ventured into this territory yet, we'd love to hear from you if you give it a try!
Now, armed with this guide, you're ready to create a pumpkin dessert that will be the star of any gathering. Happy baking!

.jpg)


